Building a 16th Century Turned Chair
The chair shown here is generally consistent in style with illustrations from the 14th to the 16th centuries, though is not patterned on any particular example. It uses the construction and joinery of a turner; all the structural members are turned, with only the seat made with flat panels. The joints are formed with round tenons and holes. This chair is turned entirely out of Cherry. While fruitwoods were known and used by medieval turners, their susceptibility to insects and decay has left few surviving examples. Ash, oak, and walnut were more commonly used for furniture(4).
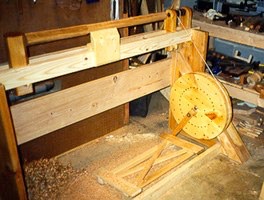
The tasks in bulding this chair are very similar those for a turned stool. The chair began as two 4 by 8-inch timbers. I ripped balks using a table saw, trimming them down with a drawknife before putting them on the lathe.
Each post is capped with a simple bun fineal. Existing samples show more complex fineals, but these are often broken and I felt that a simple profile would stand up better to wear.
Next, I turned the horizontal rails. All rails are approximately 1-1/4 inches in diameter. The front and back rails are 16 inches, the side rails are 14 inches. These rails again repeat the three-ring design from the posts.
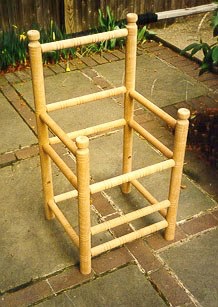
The seat rails must be at the same level to support the seat (center ring), but the other rails may be staggered so that the tenons do not intersect (upper and lower rings).
With the frame assembled, mark the ends of each seat rail where they intersect the center ring. This provides reference points for marking the seat mortises.
I also find it easier to measure the true length of the vertical spindles with the frame assembled, as my rails are not always of an exactly consistent diameter.
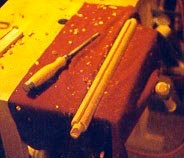
To mark the mortise, I use my mortising chisel to score the width at each end of the rail. I then snap a line down each side of the mortise and score it with a sharp knife. It is then an easy matter to cut the mortise, provided the chisel is sharp.

The seat on this chair was cut from a 5/4 cherry plank, edge-joined on one edge with a joining plane, and rabbeted on the other three side with a rabbet plane. A marking gauge makes layiing these out much easier.
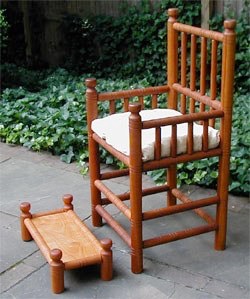
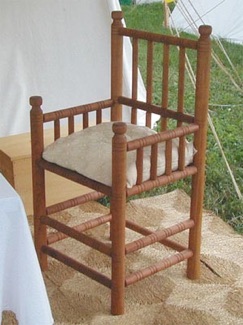
The finished (unfinished) chair. Cherry darkens as it ages, especially when exposed to moderate sunlight.
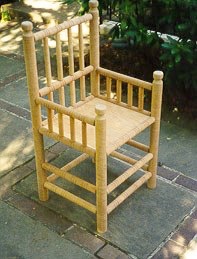
The same chair a few years later.
For a finish, I chose linseed oil. For more ceremonial purposes,
the chair might have been painted and perhaps gilded as well.
Notes
(1) Gloag, pg. 89.
(2) Chinnery, pg. 88.
(3) Chinnery, pg. 98.
(4) Chinnery, pg. 84.
Sources
-
 Chinnery, Victor. Oak Furniture, the British Tradition. Antique Collectors' Club, Suffolk, 1979.
 -
Gloag, John. A Social History of Furniture Design, from B.C. 1300 to A.D. 1960. Bonanza Books, New York, 1966.
Through much of the Middle Ages, chairs with arms and backs were regarded as prestigious items. While not restricted by sumptuary laws, the cost in time and/or money to own one made them a sign that the owner was a person of at least some influence. They came in a variety of designs, with seats of solid panels, woven rush or hemp, or leather. Turned chairs appear in European records as early as the eleventh century1, and some surviving examples are believed to date from before 13002.
The styles used for turned chairs are difficult to date due to the conservative nature of the turning trade. One example, the so-called King Stephen's Throne (or Hereford Chair), has been variously dated from 1300 to 16003. In general, early turned chairs are illustrated as being somewhat plain, with relatively simple ring and ball designs and a square or rectangular seat. Later, they displayed more and more of the turner's art, with dozens of ornate spindles sprouting yet more spindles. Later examples also often have seats that flair outward, being narrower at the back than the front (sometimes called a "farthingale seat," though there is no evidence that the fashion of farthingales was the force behind the shape of the seat.
Copyright 2019, Thomas Rettie.